白海豚颱風路徑大轉彎?強颱逼近琉球「下週恐靠近台灣」 颱風假機會、最危險路徑一次看
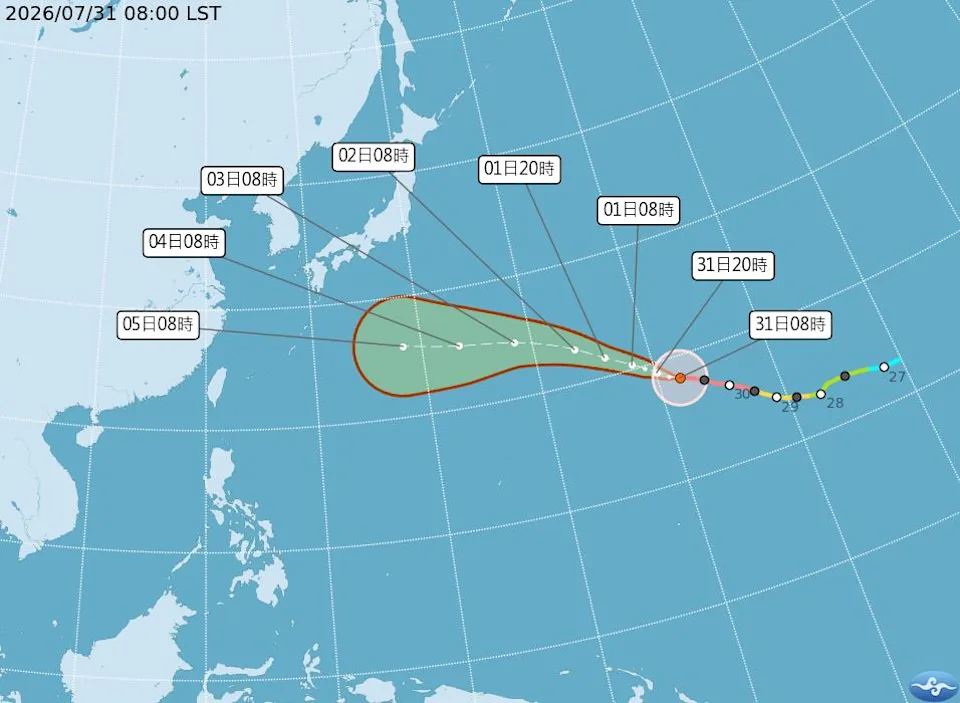
強烈颱風「白海豚」正在西北太平洋快速發展,而且最新路徑出現令人高度關注的變化! 原本不少預報認為白海豚颱風後續 … 閱讀全文
強烈颱風「白海豚」正在西北太平洋快速發展,而且最新路徑出現令人高度關注的變化! 原本不少預報認為白海豚颱風後續 … 閱讀全文

台灣半導體產業傳來震撼消息。 力積電(6770)董事長黃崇仁於2026年7月31日離世。根據力積電公告與目前公 … 閱讀全文

昨天還在問「台股到底了沒?」今天卻變成「昨天為什麼要賣?」 台股短短一天,上演堪稱史詩級的大逆轉。 2026年 … 閱讀全文

台股暴跌、所有人忙著逃命時,竟然有人真的拿出 1億元進場買0050。 而且不是說說而已。 知名分析師郭哲榮先前 … 閱讀全文

「我以為離開了、劃清界線,一切就會結束。」 沒想到,事情並沒有真正結束。 曾主持汽車節目《夢想街57號 預約你 … 閱讀全文

「我哭了一整晚。」 資深彩妝師陳聆薇(陳俐聆、小薇姐)病逝的消息傳出後,震撼台灣演藝圈。 她不是經常站在鎂光燈 … 閱讀全文

「前幾天才去給陳醫師看診,明明看起來氣色很好……」 台中大甲醫界傳出令人震驚的消息。 在地方服務多年、曾任李綜 … 閱讀全文

誰能想到,《單身即地獄3》播完多年後,真正讓觀眾等到的「售後CP」,竟然不是當年節目裡最熱門的配對? 韓國人氣 … 閱讀全文

Tom Holland’s Spider-Man is finally back. After years o … 閱讀全文

AI聊天工具已經成為許多人每天工作、學習與生活不可或缺的一部分,但如果有一天,你和AI討論的履歷、公司機密、程 … 閱讀全文